How to customise your link previews on LinkedIn
Posted on: June 9, 2022
Post Category: Professional Development
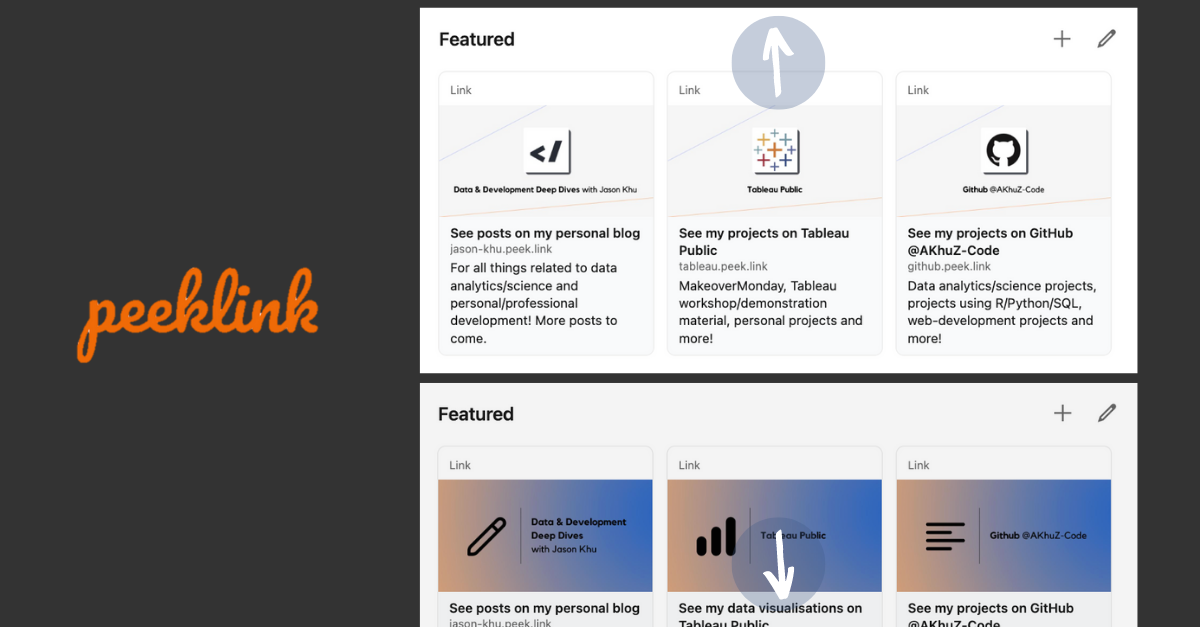
Can you really edit the preview image of links you share on LinkedIn?
Earlier in the year, I came across Alisa Prem’s LinkedIn profile and saw that she got the preview images of the links in her featured section customised. Prior to seeing her profile, I didn’t think it was possible, until I looked into the tool used to create the links: peeklink!
This post is for anyone who wants change the preview image of the links in their featured section on LinkedIn. Perhaps you have a blog or a portfolio on Github, Figma or Tableau Public, but you don’t really like the preview image that has been automatically rendered. Peeklink is a free online tool that you can use to customise the images.
You can access peeklink here.
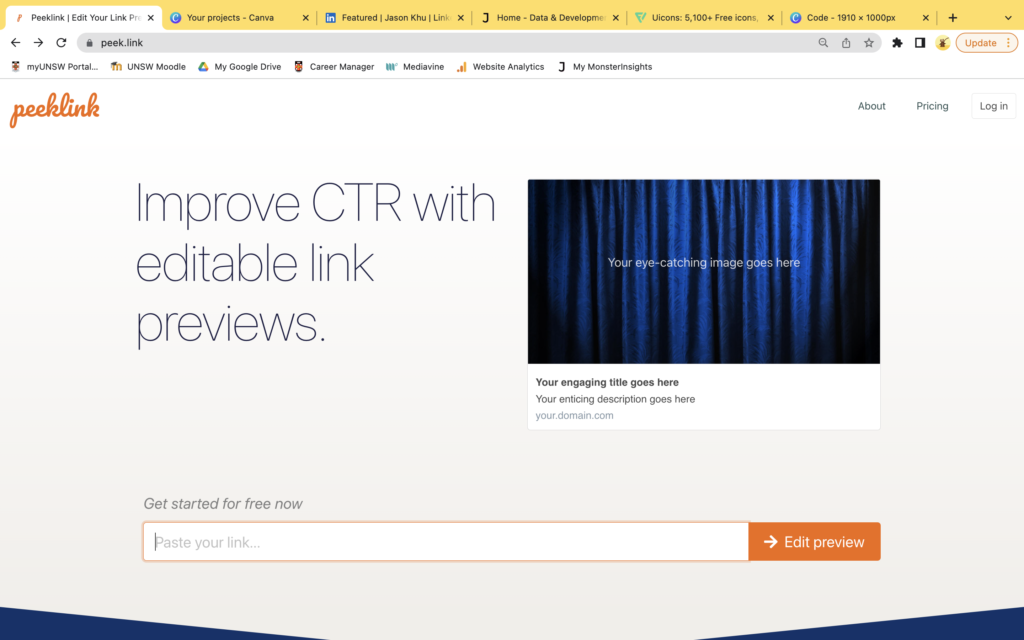
When you open peeklink, you will see a single-line text field where you can paste your link. Paste the link you want to create a preview image for and then click the Edit preview button.
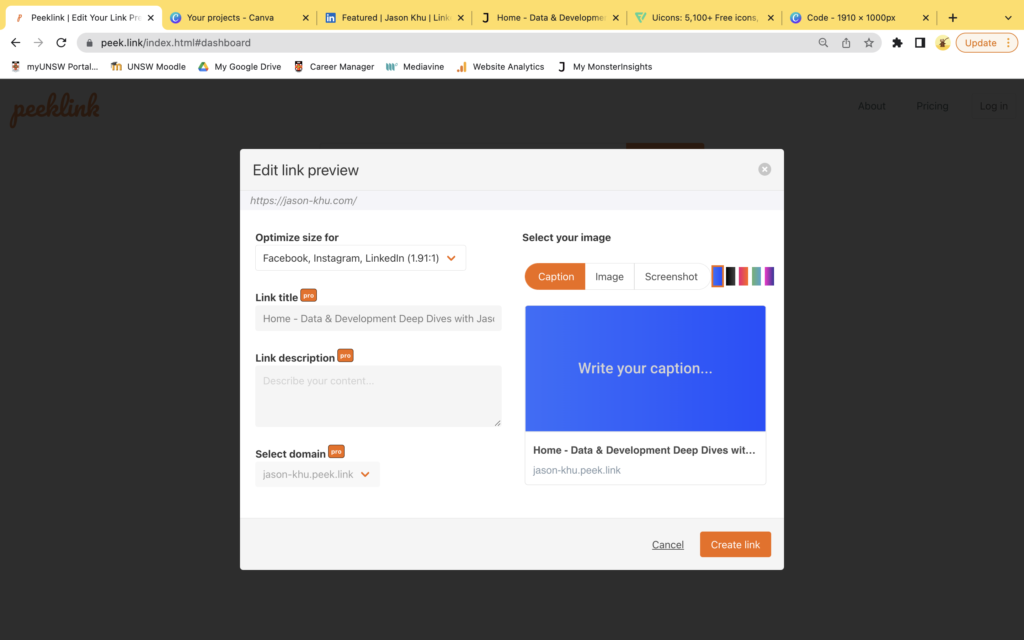
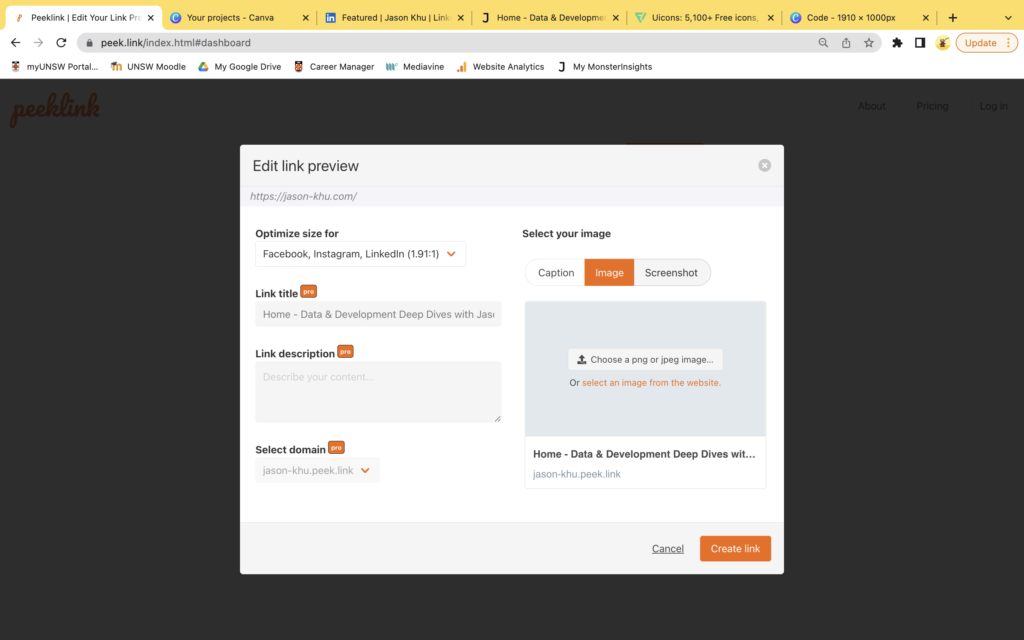
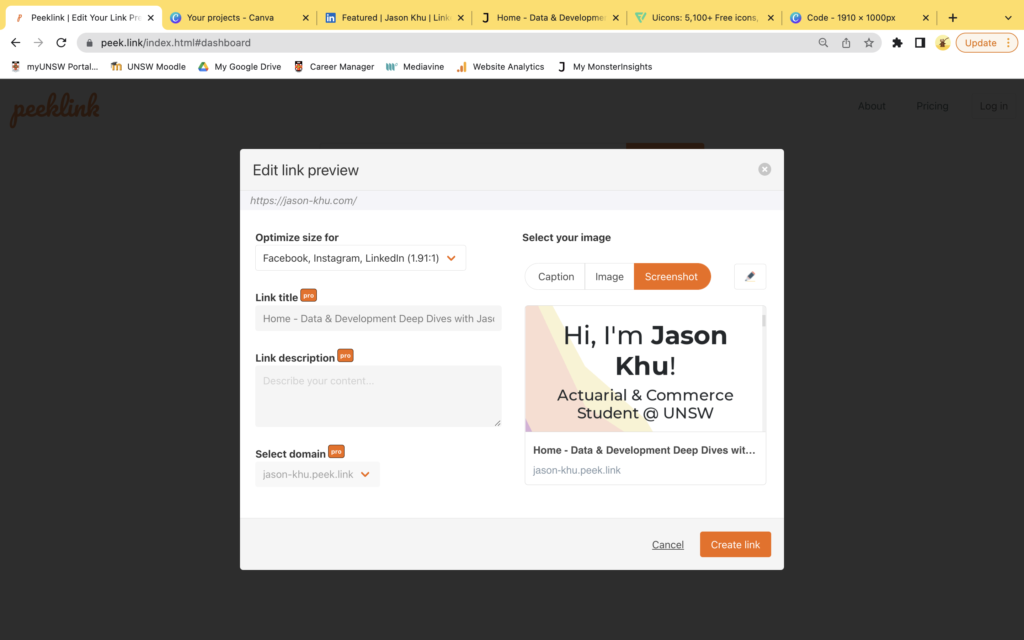
After you clicked Edit preview, you will directed to a dialogue box where you can add a caption, image or screenshot.
- For the caption option, you can add a caption directly by clicking the text field in the preview image: ‘Write your caption…’. At the top right hand side of the dialogue box, you can change the background colour of the preview image.
- For the image option, you can upload a jpeg or png for your preview image. I highly recommend this option if you would like complete customisation. You can easily use a design tool like Canva to create the image and download it for upload.
- For the screenshot option, the preview image will be a screenshot of the webpage your link directs to. In the preview image area, you can scroll up and down the webpage if you would like your screenshot to capture another section of the webpage.
On the left hand side of the dialogue box, you can also edit the link title, link description and link domain with a pro account. If you are using peeklink for LinkedIn previews, you do not need to worry about these pro features, unless you want to change the domain of your link.
Once you’re happy with your preview image, click Create link.
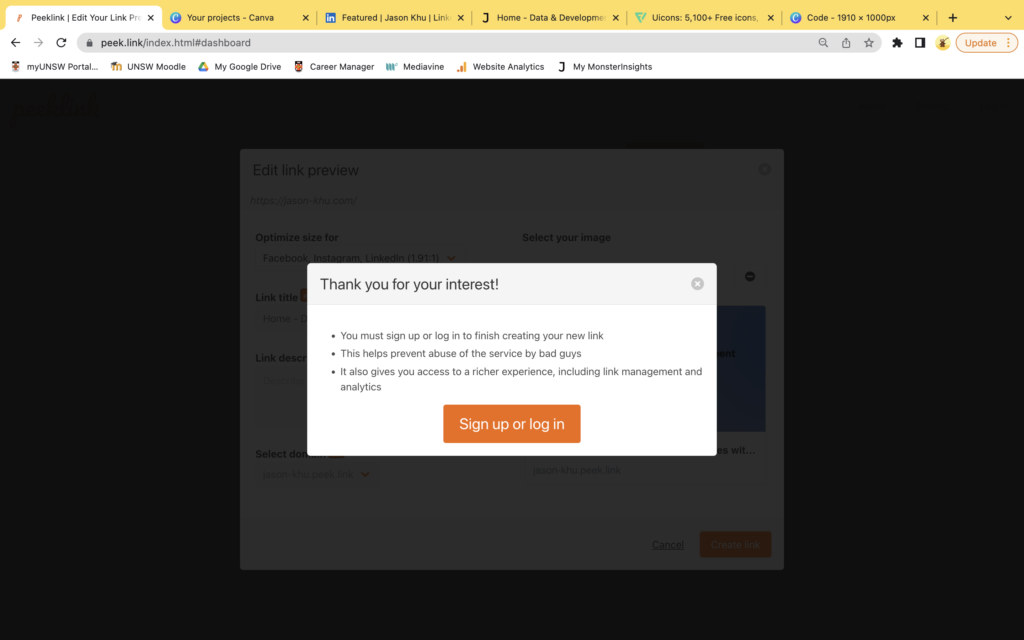
After you create your link, you will be prompted to create an account with peeklink. Don’t worry, the sign up process is quick and easy. Click Sign up or log in.
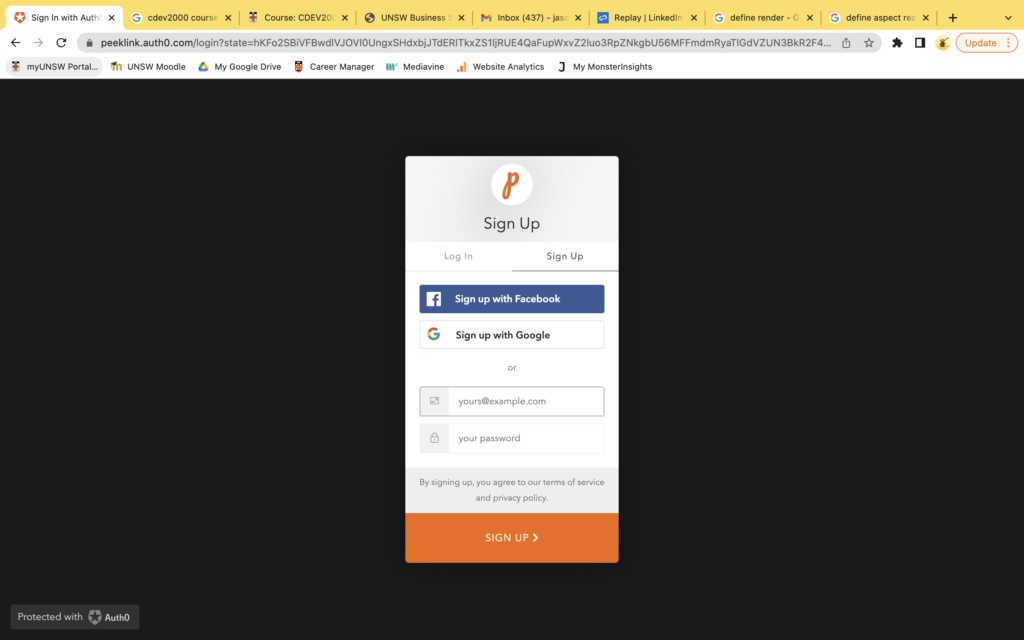
On the sign in page, you have the option to log in or sign up. Click the sign up option.
If you are logged into Google or Facebook on your device, you can sign up in a few clicks. Otherwise, input your email and password (and follow the next steps for signing up).
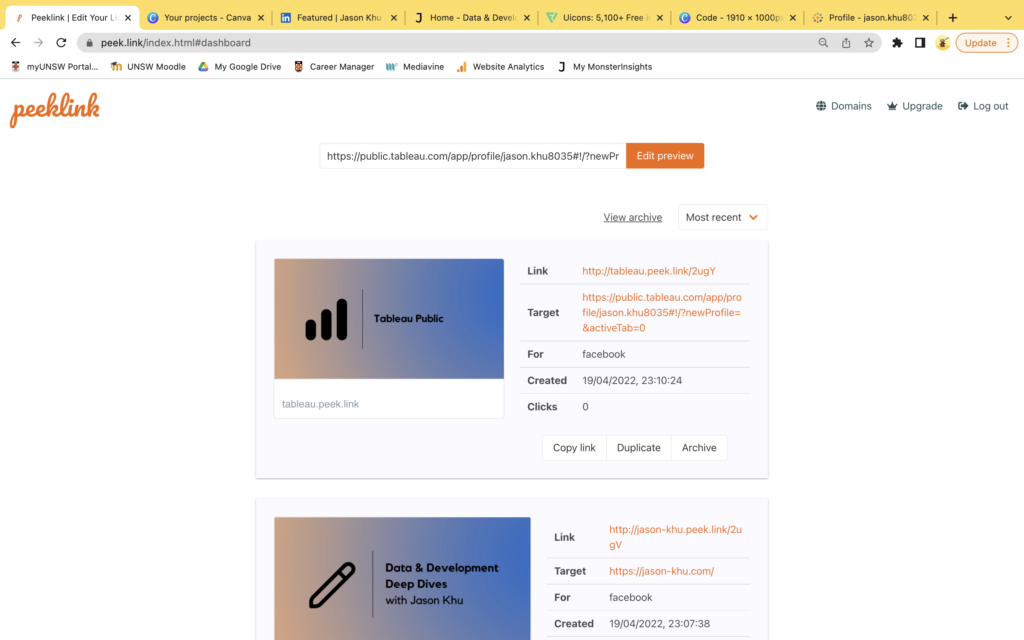
After you successfully sign up, you will be brought to your peeklink dashboard. On your dashboard, at the top, you can create a new link preview and, under that, you can see all the links you have created.
For the links you have already created, you can copy link, duplicate and archive.
- To share one of your links, simply go to the link you want to share and press copy link. You can then paste the link on whatever platform you want to share it on.
- To duplicate one of the links to your dashboard, press duplicate.
- To hide one of the links from your dashboard, press archive.
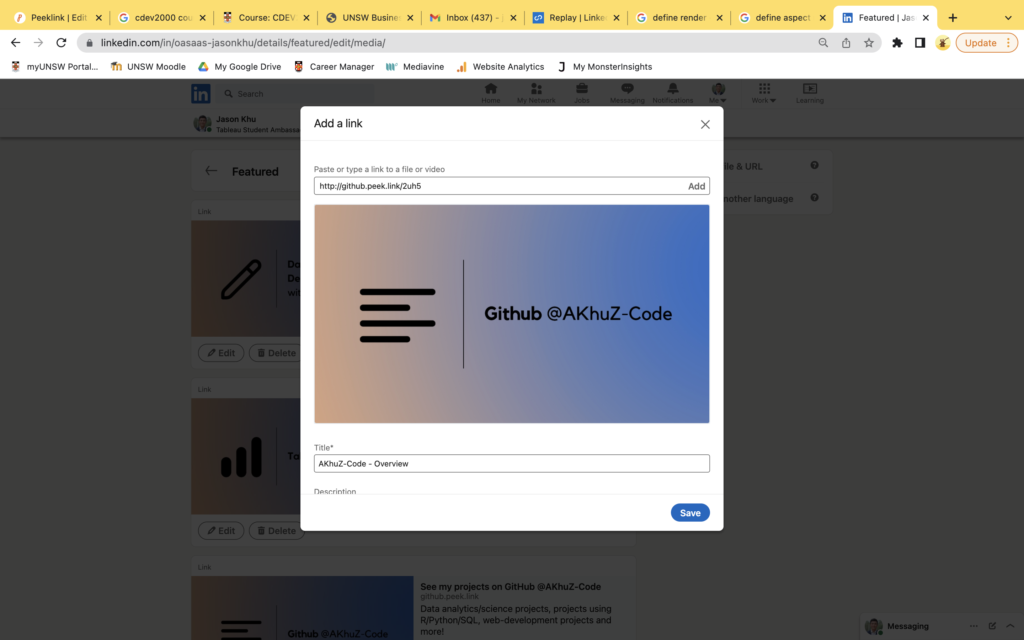
When you copy and paste your peeklink-customised link on LinkedIn – to add it as a featured item on your profile – the preview image you have created will pop up!
And that’s how you customise the preview images to your links on LinkedIn! I hope this was useful. Feel free to share this with your network! And feel free to reach out or post your comments if you have any questions.

About the author
Jason Khu is the creator of Data & Development Deep Dives and currently a Data Analyst at Quantium.